make money with food photography
If you have always dreamed of being able to stay home with your kids and still help your family, YOU CAN as a food photographer for bloggers.
Free video training!

Oct 25, 2024
How to Photograph a Recipe Step 4: The Heroes
You did it! You’ve made it to Step 4 of our “How to Photograph a Recipe” series! If you’ve been following our YouTube channel, you’ve already had access to this final episode for a while. But let’s dive into it in our blog and explain what you need to know about photographing heroes.
So far, we’ve walked you through:
- Part 1: Setting up your photography studio and food styling area. Plus, how to take photographs using natural light.
- Part 2: How to choose your styling props and prep ingredients.
- Part 3: Composing your ingredients shots, including setting the white balance, getting the angles right, and more tips and tricks.
Now, we will take you to the finish line of photographing a recipe and discuss all the tips, tricks, and details of taking your final recipe photos—the Heroes.
What Are “Heroes” in Food Photography?
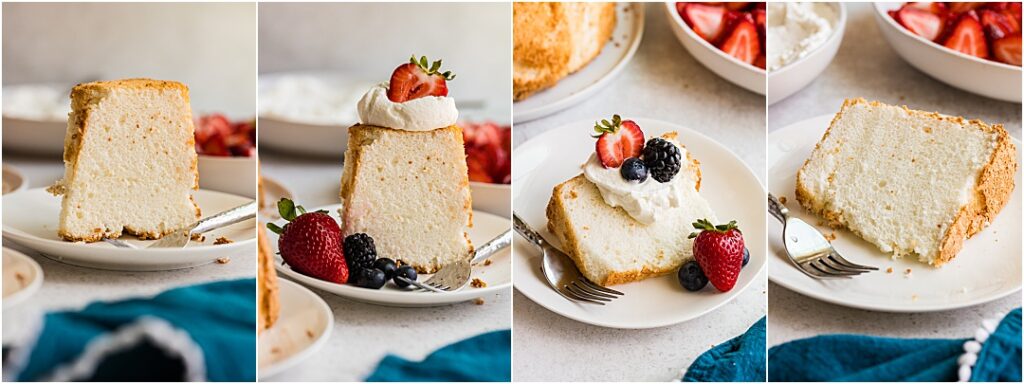
When we talk about “Heroes,” we’re talking about the money shots. These are the photos of the final product—the recipe's finished result. The “Heroes” are the critical photos used to sell the recipe to bakers/cooks.
Ingredient shots are essential because they help the reader follow the recipe correctly. But a photo of some bowls and ingredients isn’t what makes someone choose a recipe in the first place. No, that is reserved for the Heroes. It is the incredible final photo of the cake—the angles, the lighting, the decadence—that makes you want to try the recipe.
The Heroes are the photos that do ALL THE WORK! So, having a variety of heroes is essential because these photos will grace the blog and be on social media and search engines, helping to drive traffic to the recipe. This means you need incredibly enticing images that stop someone’s endless scrolling and make them say, “I want to make that recipe!”
How to Photograph a Recipe: The Heroes!

To photograph the best Heroes possible, there are three steps we like to take. These steps help us to get all of our ducks in a row and ensure that we get out of our food photography session exactly what we want.
Heroes Step 1: Make a List
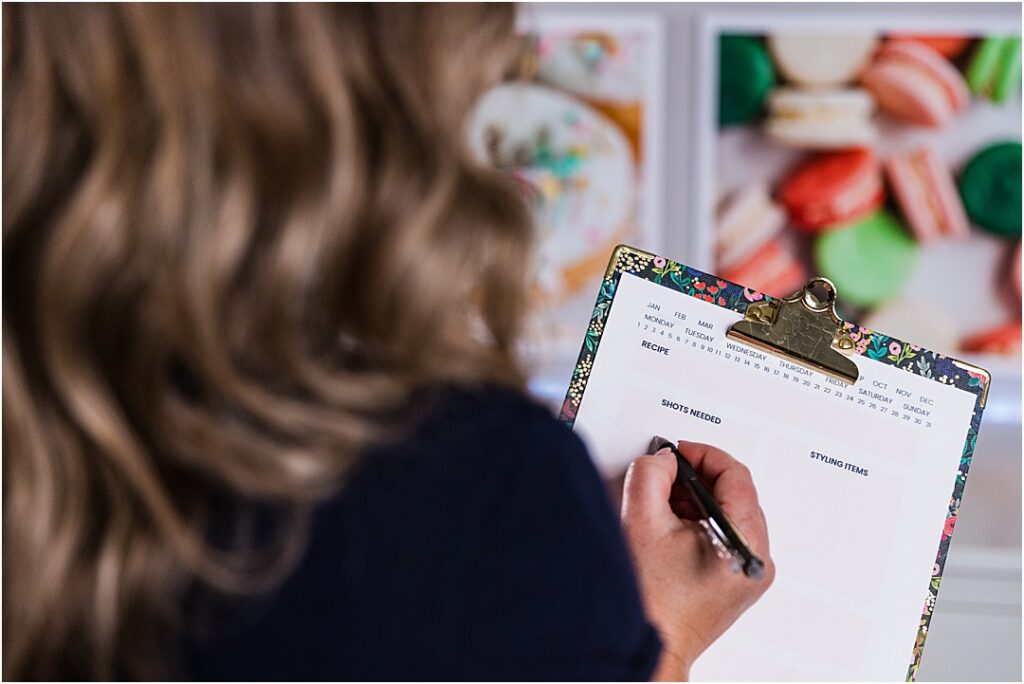
Before you grab your camera and finish baking your angel food cake, stop and make a list of all the photos you want and what you need to prepare. This list will help you stay focused and in the zone so you don’t forget anything. In food photography, you only have one chance to take your photos unless you want to remake your recipe, so the more prepared you are, the better.
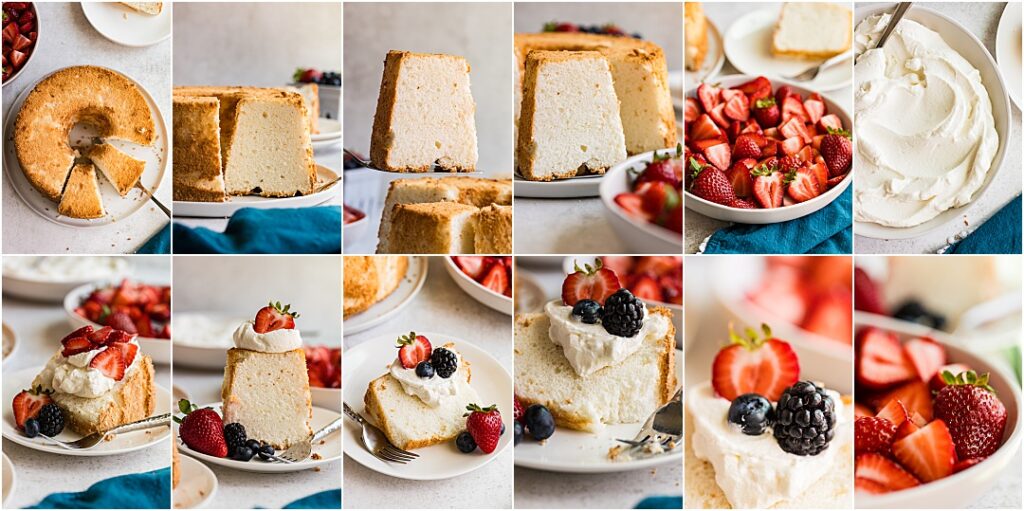
When making your list of photos, always consider the steps you would take to serve the food to guests—from oven to eating. Here’s an example list of how to photograph a recipe for the angel food cake:
- Cake fresh out of the oven.
- Cake cooled and out of the pan, on the rack:
- overhead
- 45 degrees
- side angle
- Cake out of the pan, on a plate, with fresh berries and whipped cream in bowls nearby.
- Two or three slices of cake that give the impression serving is in progress.
- Single slice of cake from the side to demonstrate the texture.
- Multiple cake slices leaning together, ready to serve.
- Single cake slice held mid-air as if it is being served.
- Garnish photos: the bowl of berries, fresh whipped cream, etc.
- Fully garnished cake slice, carefully arranged.
- Multiple options, angles, and looks with different garnishes.
- Fork shot: a clean bite of cake with all the fixings.

Heroes Step 2: Prep the Ingredients and Styling
Since there can be a time crunch to finish the Heroes as soon as the recipe is finished, do everything you can to prepare for the photography session. This means going through the list we wrote above and figuring out what ingredients and styling prep must be done before the first photo is taken.
For example, if you need fresh fruit garnish for the Heroes, get those strawberries washed, cut, and arranged. Make the homemade whipped cream topping and set that aside. Then, if there are particular plates, silverware, linens, or other decorative touches you want in the Heroes, grab them and set them out, ready to use.
You can check out some of our recommended gear here!
Heroes Step 3: Take the Photos
Once everything is prepped, it’s time to start taking photos. This is when you’ll want to refer to your list and go through how to photograph the recipe step by step. Here are a few things to keep in mind.
- Take multiple photos with different angles at each step before you move on. This is especially important because once you add whipped cream or cut a slice out of the cake, you can’t go back and re-do anything you missed.
- When setting up your board, focus on colors and contrast. For example, if you have a beige/orange cake, red and blue berries, and white whipped cream, teal linen might be the perfect complementary color to round out the shot.
- Use different lenses to get the right shots. For example, you might use a 100 to get a close-up of the cake texture and feel. Then, you might switch to a 50 to get a wider overhead shot.
- Always center the “Hero” (the actual final product: the cake) in the bottom two-thirds of the photo. Remember, we are focused on the food, not the scene.
- Review every photo before moving on to see if anything is needed or missing. For example, if there is a hole in the background, move the bowl of berries to fill it in and add some color and contrast. Then, take another photo.
Tips and Tricks for Food Photography
In the end, if you have it all planned out, it shouldn’t take you more than 30 minutes to take all the “Heroes” that you need. So, how do you make sure it goes that smoothly? Here are a few final tips and tricks.
- Take a variety of photos for every shot on your list. For example, take pictures of the cake slices standing upright and lying flat. Add more or less garnish, try close-up angles, overhead shots, etc. It’s better to have too many options than too few.
- Always focus on the “Hero!” In this case, the cake. If the cake is ever not the centerpiece, then it is not an appropriate Hero. This might mean using less garnish than you normally would in order to highlight the cake instead of the toppings.
- Download our Recipe Session Planner. This is an absolutely free worksheet that you can use to outline every step we detailed above—it’s the exact worksheet we used in the video. But more than that, it is also a weekly planner and a visual “sketch it out” that you can use to break down every recipe.

Thanks for tuning in to our four-part blog and video series, which are all about how to photograph a recipe. We hope you’ve enjoyed the journey with us and learned a lot along the way. And don’t worry! We’ll be doing more of these short videos and blog series coming up, so make sure to stay tuned. And if you love what you’ve learned and want to take the next step with Pretty Focused, sign up for our class today!

Pretty Focused Founder | I’m a wife, educator, photographer and homeschool mom. I created my own dream job working from home and now teach others how to turn their passions into creative businesses.
PRIVACY / disclaimer / accessibility / Code of conduct / Earnings Disclaimer / Be an Affiliate
melodee lynn photography llc - Copyright 2023
PRETTYFOCUSED.COM
melodee lynn photography llc
Copyright 2023
PRETTYFOCUSED.COM
PRIVACY / disclaimer / accessibility Code of conduct / Earnings Disclaimer
Be an Affiliate